
Indoor vegetable plants like lettuce, herbs, tomatoes, peppers, and microgreens can successfully produce fresh food year-round when provided with 6-8 hours of quality light, proper containers with drainage, and consistent care—no outdoor garden required.
Imagine plucking fresh cherry tomatoes or snipping crisp lettuce for tonight’s salad—without stepping outside. Growing indoor vegetable plants transforms your home into a year-round edible garden, bringing farm-fresh flavor to your fingertips no matter the season or outdoor space limitations.
Many aspiring indoor gardeners struggle with choosing vegetables that actually produce indoors, managing light requirements in apartments, and troubleshooting issues like leggy seedlings or bitter-tasting leaves. The confusion between what works in a traditional garden versus what thrives in your living room often leads to disappointing harvests and abandoned projects.
This comprehensive guide walks you through selecting the best indoor vegetable plants for beginners and experienced growers alike, understanding essential growing conditions (light, containers, soil), solving common cultivation challenges, and integrating your edible plants into attractive house plants design ideas that make your space both beautiful and productive.
Page Contents
Best Indoor Vegetable Plants for Year-Round Harvests
Growing fresh vegetables indoors transforms your living space into a productive year-round garden. Whether you’re working with a sunny windowsill or supplementing with grow lights, choosing the right crops makes all the difference between frustration and abundant harvests.
Leafy Greens: Your Indoor Garden Champions
Lettuce, spinach, arugula, and kale are the superstars of indoor vegetable gardening—and for good reason. These leafy greens adapt beautifully to container life because their shallow root systems need only 4-6 inches of soil depth. You’ll get your first harvest in just 30-45 days, and here’s the best part: you can keep cutting outer leaves while the center keeps producing new growth.
This “cut-and-come-again” method means one planting gives you fresh salads for weeks. Lettuce varieties like ‘Buttercrunch’ or ‘Tom Thumb’ work perfectly on sunny windowsills, while spinach tolerates slightly lower light conditions. If you’re working with limited natural light, leafy greens are forgiving—they’ll still produce with 4-6 hours of quality light, making them ideal for apartment vegetable gardens.
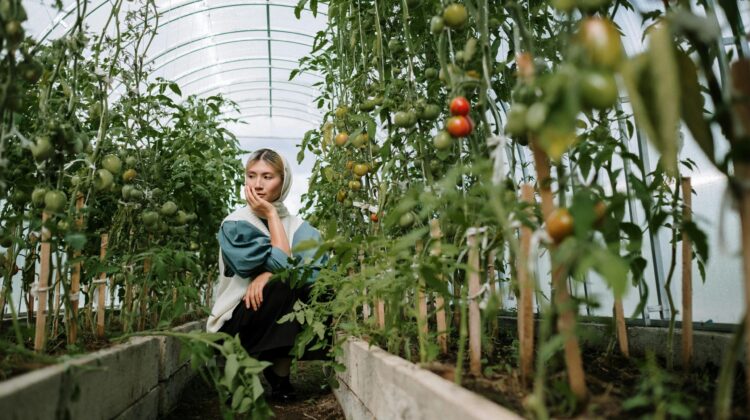
Compact Fruiting Vegetables That Actually Produce Indoors
Cherry tomatoes, dwarf peppers, and mini eggplants bring the satisfaction of real fruit production to your indoor vegetable garden. The secret is choosing determinate or dwarf varieties bred specifically for containers—look for names like ‘Tiny Tim’ tomatoes or ‘Lunchbox’ peppers. A single cherry tomato plant can produce 20+ fruits indoors when given proper care and hand-pollination.
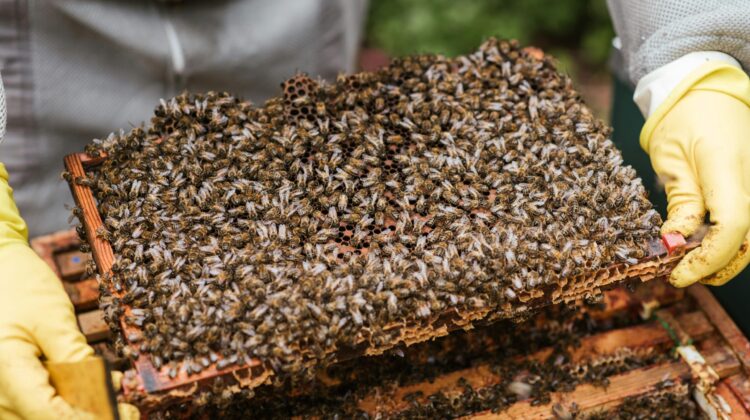
Yes, you’ll need to play bee by gently shaking flowering stems or using a small paintbrush to transfer pollen between flowers. These best vegetables to grow inside need more light than greens (8-12 hours daily), but the payoff of homegrown tomatoes in January makes it worthwhile.
Good Tip!
Start with cherry tomato varieties labeled “determinate” or “patio”—they stay compact (2-3 feet tall) and fruit faster than traditional varieties, giving you quicker results and easier management in small spaces.
Root Vegetables for Deep Containers
Carrots, radishes, and beets prove that growing vegetables indoors isn’t limited to leaves and herbs. The catch? You need containers at least 8-12 inches deep to accommodate their downward growth. Round or short varieties work best in limited vertical space—’Paris Market’ carrots grow into adorable golf ball-sized roots, while ‘Easter Egg’ radishes mature in just 25 days.
Beets give you double value: harvest the nutritious greens early, then wait for the roots to develop. Root vegetables need less light than fruiting plants, making them practical for year-round indoor vegetables even in moderate light conditions.
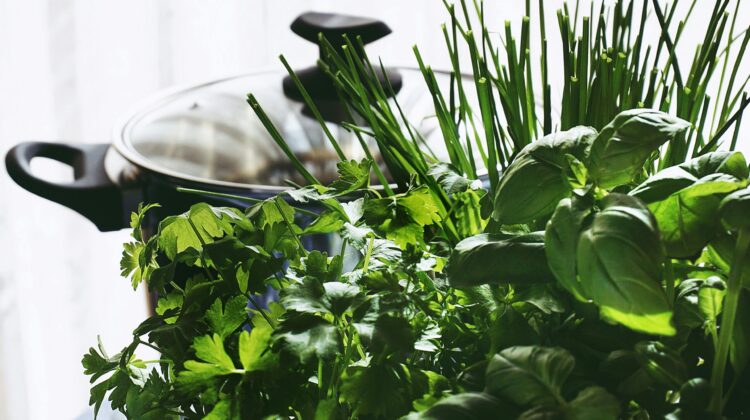
High-Value Herbs: Your Gateway to Indoor Vegetable Gardening
Basil, cilantro, parsley, and chives are where every beginner should start. These culinary herbs qualify as indoor vegetable plants that build your confidence fast while delivering immediate kitchen value. Basil grows vigorously and responds beautifully to frequent pinching (which gives you more leaves and prevents flowering). Cilantro bolts quickly, so plant new seeds every 3 weeks for a continuous supply.
Chives are nearly indestructible and keep producing for years. The best part? Fresh herbs cost $3-4 per tiny package at grocery stores, but a $2 seed packet produces months of harvests. Start here, taste success, then expand to more ambitious crops—this progression builds both skill and confidence as you learn what your indoor environment can support.
Essential Light Requirements for Indoor Vegetable Plants
Light is the single most important factor determining whether your indoor vegetable plants thrive or merely survive. Understanding your home’s natural light patterns and knowing when to supplement with artificial lighting separates successful indoor gardeners from frustrated ones.
Understanding Your Natural Light Situation
Before you buy a single grow light, take a good look at what your home already offers. Walk around with a notebook and check which windows get the most sun throughout the day. South-facing windows are your best friends—they deliver 6-8 hours of direct light in the Northern Hemisphere, which is perfect for most indoor vegetable plants. East and west windows work too, but they’ll give you about 4-6 hours. North-facing windows? They’re great for ferns, but your tomatoes won’t be happy there.
Here’s a simple trick to measure light intensity: the shadow test. Hold your hand about 12 inches above where you plan to put your plants at midday. If you see a sharp, dark shadow, you’ve got bright light. A fuzzy shadow means medium light. No shadow at all? That spot won’t grow much beyond microgreens.
Leafy greens like lettuce, spinach, and arugula are forgiving—they’ll produce decent harvests with just 4-6 hours of quality light. But if you’re dreaming of peppers or tomatoes, you’ll need 8-12 hours minimum, which usually means supplementing with artificial light. This is where understanding your specific growing conditions becomes essential for matching crops to available light.
Choosing the Right Grow Lights for Your Indoor Garden
When natural light falls short, grow lights become essential equipment. LED lights have basically taken over the indoor gardening world, and for good reason. They use half the electricity of older fluorescent bulbs, run cooler, and last years longer. You’ll see terms like “PAR” (Photosynthetically Active Radiation) thrown around—this just measures the light your plants actually use. Look for lights with PAR values between 200-400 for leafy greens and 400-600 for fruiting vegetables.
Light spectrum matters more than you might think. Blue light (around 400-500nm) promotes bushy, leafy growth—perfect for your lettuce and herbs. Red light (600-700nm) triggers flowering and fruiting, which your tomatoes and peppers need. Most quality LED grow lights combine both spectrums, often with a purple-ish glow.
Budget-wise, expect to spend $30-50 for a basic LED panel that covers 2-3 square feet, or $100-200 for larger setups that can handle a full countertop garden. Urban Leaf’s guide to indoor vegetable lighting breaks down specific recommendations if you want to dive deeper into product options.
Good Tip!
Invest in a simple outlet timer ($10-15) from day one. Set it for 12-16 hours daily and forget about it—your plants get consistent light, and you don’t have to remember to flip switches twice a day.
Getting the Distance and Timing Right
Hang your LED grow lights 6-12 inches above your plants’ tops. Too close and you’ll burn the leaves (brown, crispy edges are the telltale sign). Too far and your plants stretch toward the light, getting leggy and weak. As your vegetables grow, raise the lights to maintain that sweet spot. Most LED fixtures come with adjustable hangers or chains that make this easy.
Timing is just as important as distance. Most vegetables need 12-16 hours of light daily. Leafy greens do fine with 12-14 hours, while fruiting plants like tomatoes prefer 14-16 hours. This is where that timer becomes your best friend—set it once and your indoor vegetable garden runs on autopilot. Consistent photoperiods (light duration) keep plants from getting stressed and help them produce better harvests.
Fixing Light Problems Before They Ruin Your Harvest
Learn to read your plants—they’ll tell you when something’s off with the lighting. Leggy stems that flop over? That’s your plant literally reaching for more light. Pale, yellowish leaves instead of deep green? Same problem. Plants that grow leaves like crazy but never flower? They need more intense light or longer photoperiods.
On the flip side, too much light causes its own issues. Brown, crispy leaf edges that look almost bleached out mean light burn. Move your fixtures higher or reduce the daily duration by an hour or two. The good news? Light problems are usually the easiest to fix in indoor gardening. Adjust your setup, wait a few days, and watch your plants bounce back. Once you nail down proper lighting, you’re ready to focus on the equally important foundation: containers and growing medium.
Containers, Soil, and Setup for Growing Indoor Vegetable Plants
The right container and growing medium create the foundation for healthy indoor vegetable plants. Get these basics right from the start, and you’ll avoid the most common problems that derail beginning indoor gardeners.
Choosing the Right Container for Your Indoor Vegetables
Root rot kills more indoor vegetable plants than any other problem. That’s why drainage holes aren’t optional—they’re essential. Every container you use needs at least one drainage hole at the bottom. Without it, water pools around the roots and creates a soggy, oxygen-deprived environment where roots literally suffocate and rot.
Size matters just as much as drainage. Your basil doesn’t need the same space as your tomato plant. Here’s what works:
- Herbs (basil, cilantro, parsley): 1-gallon containers work perfectly
- Leafy greens (lettuce, spinach, arugula): 2-3 gallon pots give them room to spread
- Fruiting vegetables (tomatoes, peppers): 5-gallon containers minimum—they need deep root systems to support all that fruit production
Container material changes how often you’ll water. Plastic pots hold moisture longer, which means less frequent watering but also more risk of overwatering if you’re not careful. Terracotta breathes beautifully and prevents soggy soil, but it dries out fast—sometimes too fast for thirsty vegetables. For beginners, plastic containers offer more forgiveness while you learn your plants’ rhythms.
Creating the Perfect Soil Mix for Indoor Success
Garden soil seems like the obvious choice, but it’s actually your enemy indoors. It compacts in containers, holds too much water, and often carries pests or diseases from outdoors. Your indoor vegetable garden needs something lighter and fluffier.
A quality soilless potting mix is what serious indoor gardeners use. Look for blends containing:
- Peat moss or coco coir: These hold moisture while staying airy
- Perlite: Those white chunks you see? They create air pockets so roots can breathe
- Vermiculite: Helps retain water and nutrients without getting heavy
You can buy pre-mixed potting soil labeled for vegetables, or mix your own following proven ratios. Either way, skip anything labeled “garden soil” or “topsoil”—those are for outdoor beds, not pots.
Good Tip!
Add a 1-inch layer of perlite at the bottom of your container before adding soil. This creates an extra drainage zone that prevents water from sitting at the bottom, even if you accidentally overwater.
Self-Watering Systems That Actually Work
Self-watering containers solve the biggest challenge in container vegetable gardening—consistent moisture. These clever pots have a water reservoir at the bottom that feeds moisture upward through capillary action. Your plants drink what they need, when they need it.
You don’t have to buy expensive self-watering planters. A simple DIY version uses a plastic bottle buried in the soil with holes poked in it, or you can set regular pots in shallow trays of water (just make sure the water level stays below the drainage holes).
Drainage trays aren’t glamorous, but they protect your floors and furniture from water damage. Choose trays slightly larger than your pot’s base. Clear plastic shows you exactly how much water drains out, while decorative ceramic trays blend with your décor. Empty excess water 30 minutes after watering—standing water invites problems.
Making Your Edible Garden Beautiful
Your indoor vegetable plants don’t have to look like a science experiment. Tiered plant stands create vertical interest while maximizing your growing space. Place taller plants like tomatoes on lower tiers, herbs and lettuce up top where you can easily snip them.
Mix your vegetables with decorative houseplants. A trailing pothos next to your basil adds visual softness. Colorful coleus complements the deep green of kale. This integration makes your apartment vegetable garden feel intentional rather than cluttered.
Container choice transforms function into style. Woven baskets (with plastic liners), glazed ceramic pots in coordinating colors, or sleek modern planters all work—just ensure they have drainage. When your containers complement your home’s aesthetic, your indoor vegetable garden becomes a design feature, not something you hide in a corner. With your containers and soil sorted, the next critical piece is maintaining your plants through proper watering and feeding schedules.
Watering, Feeding, and Maintenance for Productive Indoor Vegetable Plants
Even with perfect containers and ideal lighting, your indoor vegetable plants won’t reach their potential without consistent care. The good news? Once you establish routines for watering, feeding, and basic maintenance, growing vegetables indoors becomes almost automatic.
Watering Schedules and Techniques
Getting watering right makes or breaks your indoor vegetable garden. Too much water drowns roots. Too little leaves plants stressed and bitter-tasting. The finger-test method takes the guesswork out. Stick your finger into the soil about 1-2 inches deep. If it feels dry at that depth, water. If it’s still moist, wait another day.
Bottom-watering changes the game for consistent moisture. Set your containers in a tray of water for 10-15 minutes. The soil soaks up what it needs through the drainage holes. This method distributes moisture evenly throughout the pot and prevents that crusty dry layer that sometimes forms on top. Your roots get what they need without the risk of overwatering the surface.
Different vegetables have different thirst levels. Leafy greens like lettuce and spinach want consistently moist soil—never soggy, never bone-dry. Tomatoes and peppers prefer a slight dry-down between waterings. This encourages deeper root growth and actually improves flavor. Check your plants daily at first until you learn their rhythm.
Fertilization for Continuous Harvests
Indoor vegetable plants eat through nutrients faster than you’d think. Container soil doesn’t replenish itself like garden beds do. A balanced liquid fertilizer with a 5-5-5 or 10-10-10 NPK ratio keeps plants productive. Mix it at half the recommended strength and feed every two weeks. This gentle, consistent feeding approach prevents nutrient burn while supporting steady growth.
Organic options work beautifully for edibles. Fish emulsion provides nitrogen for leafy growth. Compost tea delivers a broad spectrum of nutrients plus beneficial microbes. Both are food-safe and won’t leave chemical residues on your harvest. Start fertilizing about a month after planting, once your plants have established their root systems.
Good Tip!
Mark your calendar with fertilizing dates or set a phone reminder. Consistent feeding every 14 days produces healthier plants and bigger harvests than remembering randomly.
Pruning and Harvesting Strategies
Smart harvesting keeps your indoor vegetable plants producing for months. The cut-and-come-again method works perfectly for greens. Take the outer leaves, but always leave the growing center intact. Your lettuce, kale, or spinach will keep pushing out new growth from that central point.
Herbs get bushier and more productive with regular pinching. When your basil or cilantro reaches 6 inches tall, pinch off the top set of leaves. This forces the plant to branch out instead of growing tall and leggy. You’ll get twice the harvest from the same plant.
Remove lower leaves from tomatoes and peppers as they grow taller. This improves air circulation around the base and prevents moisture-related diseases. Plus, it directs the plant’s energy toward producing fruit instead of maintaining unnecessary foliage.
Pest Management in Indoor Environments
Indoor pests are sneaky but manageable. Aphids cluster on new growth. Fungus gnats hover around soil. Spider mites leave fine webbing on leaves. Catching them early makes control much easier.
Prevention beats treatment every time. Good air circulation discourages most pests—run a small fan near your growing vegetables indoors setup. Avoid overwatering, which creates the damp conditions fungus gnats love. Check plants weekly, especially the undersides of leaves where pests hide.
When pests appear, neem oil is your friend. It’s organic, safe for food crops, and effective against most common indoor pests. Mix according to package directions and spray in the evening when lights are off. Repeat weekly until pests disappear. For fungus gnats, let the soil dry out more between waterings and they’ll vanish on their own. Even with diligent care, problems occasionally arise—knowing how to diagnose and fix them quickly keeps your harvest on track.
Troubleshooting Common Problems with Indoor Vegetable Plants
Every indoor gardener faces challenges. The difference between success and frustration lies in recognizing problems early and knowing exactly how to fix them. These common issues have straightforward solutions once you understand what your plants are telling you.
Leggy, Stretched Growth
Your plants are reaching for something they can’t find—light. When indoor vegetable plants develop long, spindly stems with lots of space between leaves, they’re suffering from etiolation. This happens when light intensity is too weak or the duration is too short. Your tomato seedlings might look like they’re doing yoga stretches, or your basil could resemble a gangly teenager.
Catch this early by watching for stems that grow noticeably taller without producing new leaves. The fix is straightforward: move your plants closer to their light source or increase the hours they receive light. If you’re using grow lights, position them 6-8 inches from plant tops. Natural window light? Rotate plants daily so all sides get equal exposure.
For plants already stretched, prune strategically. Cut leggy stems back by one-third, just above a leaf node. This encourages bushier, more compact regrowth. With herbs like basil, pinch off the top growth to promote side branching instead of vertical stretching.
Yellowing Leaves and Nutrient Deficiencies
Yellow leaves tell different stories depending on where and how they appear. Overwatered plants show yellowing paired with wilting—the leaves look sad and droopy even though the soil is wet. Stick your finger two inches into the soil. If it’s soggy, you’ve found your problem. Let the soil dry out between waterings.
Nitrogen deficiency shows up differently. Lower, older leaves turn yellow while new growth stays green. The plant is pulling nitrogen from old leaves to feed new ones. Fix this with a balanced liquid fertilizer at half strength every two weeks.
Sometimes yellowing is just natural aging. Bottom leaves on tomatoes or peppers naturally yellow and drop as the plant matures. If only one or two lower leaves turn yellow while the rest looks healthy, don’t worry—just remove them.
Good Tip!
Take a photo of your plant each week. Comparing images helps you spot gradual changes in leaf color or growth patterns that you might miss day-to-day.
Flowering but No Fruit Production
Your pepper plant is blooming beautifully, but where are the peppers? Indoor fruiting vegetables need help with pollination since there are no bees buzzing around your apartment. Tomatoes, peppers, and eggplants produce flowers that must be pollinated to set fruit.
Hand-pollination is simple. Use a small paintbrush or cotton swab and gently dab inside each flower, moving pollen from one bloom to another. Do this in the morning when flowers are freshly open. For tomatoes, try the shake method—gently tap or shake the main stem to release pollen.
Temperature matters too. Peppers won’t set fruit if nights drop below 60°F or days exceed 90°F. Tomatoes struggle when temperatures stay above 85°F. If your home runs hot or cold, adjust your thermostat or move plants to a more moderate location. For more detailed solutions to common indoor growing challenges, check out this troubleshooting guide for indoor edible gardens.
Bitter or Poor-Tasting Harvests
Your lettuce tastes like you’re chewing cardboard dipped in battery acid. Something went wrong, and it’s usually stress-related. Inconsistent watering is the main culprit for bitter lettuce. When soil alternates between bone-dry and soaking wet, lettuce produces bitter compounds as a stress response. Keep soil consistently moist—not soggy, not desert-dry.
Heat makes arugula and radishes unbearably spicy. If your indoor temperature regularly hits 75°F or higher, these cool-season crops will taste like fire. Grow them in cooler months or the coolest spot in your home.
Bland tomatoes usually mean insufficient light. Tomatoes need strong light to develop sugars and complex flavors. If your tomatoes taste watery and boring, they’re probably getting less than 8 hours of quality light daily. Boost light intensity with grow lights or move them to your sunniest window. Once you’ve mastered these troubleshooting basics, you’re ready to explore techniques that dramatically increase your yields.
Advanced Techniques: Maximizing Yields from Indoor Vegetable Plants
After you’ve grown a few successful crops, these advanced methods help you produce more food from the same space. They’re not complicated—just strategic approaches that serious indoor gardeners use to maximize every square inch.
Vertical Growing Systems: Triple Your Growing Space
Running out of floor space? Go vertical. Tower gardens, wall-mounted planters, and tiered shelf arrangements can triple your growing capacity without claiming more square footage. Think of it as apartment living for plants—when you can’t build out, you build up.
These systems work especially well for lettuce, spinach, and herbs. Their shallow roots don’t need deep containers, so you can stack multiple levels without worrying about root crowding. A simple three-tier plant stand near a sunny window can produce enough salad greens for weekly harvests. Wall-mounted pocket planters turn unused vertical space into productive growing areas, perfect for small apartments where every inch counts.
The beauty of vertical systems? They also improve air circulation around your plants, reducing disease problems common in crowded horizontal setups. Plus, they make harvesting easier—no bending down to reach plants on the floor.
Good Tip!
Place your fastest-growing crops (like lettuce and herbs) on the most accessible middle tiers, and reserve top and bottom shelves for slower growers like peppers that need less frequent harvesting.
Succession Planting for Continuous Harvests
Want fresh lettuce every week instead of 20 heads all at once? That’s where succession planting comes in. Start a new batch of seeds every two weeks, and you’ll have a constant supply of harvestable greens.
Here’s how it works: Plant your first round of lettuce on Week 1. Two weeks later, start another container. By the time your first planting is ready to harvest (around 30-45 days), you’ll have younger plants coming up behind it. This staggered schedule means you’re never overwhelmed with produce and never running out.
Try intercropping too—pair fast growers with slow ones in the same container. Plant quick-maturing radishes alongside slower tomatoes. You’ll harvest the radishes long before the tomato needs that space. Keep a simple harvest calendar on your fridge. Mark when you planted each crop and when you expect to harvest. This planning makes year-round production feel manageable instead of chaotic.
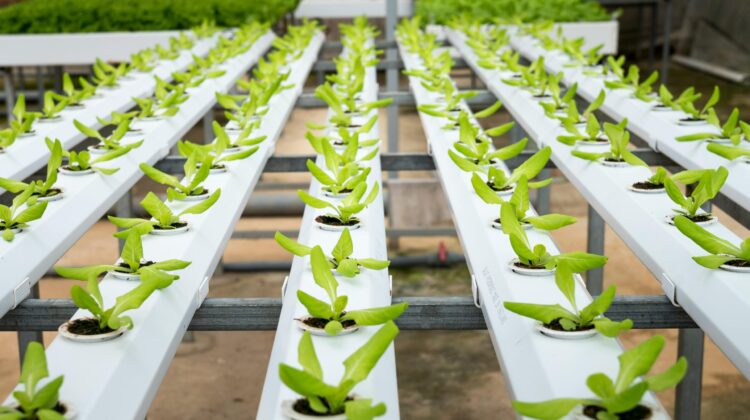
Hydroponic and Semi-Hydroponic Options
Hydroponics sounds intimidating, but the Kratky method makes it beginner-friendly. This passive system needs no pumps, no electricity, and no complicated equipment. You simply suspend plant roots in nutrient-rich water and let them grow.
Plants in hydroponic setups typically grow 20-30% faster than soil-grown ones. Why? Direct access to nutrients and water means roots don’t waste energy searching for food. The initial investment runs higher—expect to spend $50-100 on containers, nutrients, and net pots—but the long-term convenience and faster harvests often justify the cost. You’ll water less frequently and deal with fewer soil-borne pests.
For those curious about maximizing crop yields with advanced indoor farming techniques, hydroponics offers a practical next step once you’ve mastered soil growing.
Seasonal Indoor Vegetable Planning
Your home’s temperature shifts with the seasons—use that to your advantage. In winter, when your heating system runs, grow heat-loving crops like tomatoes and peppers. They’ll thrive in that warm, dry air. Come summer, when air conditioning keeps things cool, switch to lettuce, spinach, and other greens that prefer cooler temps.
This seasonal rotation also refreshes your indoor garden’s appearance, connecting nicely with decorative house plants design ideas. Swap out your summer salad bar for colorful winter tomatoes and peppers. Your indoor vegetable plants become part of your seasonal décor, not just a food source.
The beauty of these advanced techniques is that they build on the fundamentals you’ve already learned. You’re not starting over—you’re simply optimizing what already works. Whether you choose vertical growing for space efficiency, succession planting for continuous harvests, hydroponics for faster growth, or seasonal planning for better temperature management, each method helps you produce more food with greater consistency. That’s when indoor vegetable gardening transforms from hobby to sustainable lifestyle.
Conclusion
Growing indoor vegetable plants successfully comes down to mastering four fundamentals: choosing appropriate varieties (leafy greens and compact fruiting types thrive indoors), providing adequate light (6-12 hours depending on crop type), using proper containers with quality potting mix, and establishing consistent care routines. When your first indoor salad garden produces enough lettuce for daily harvests through a harsh winter, you’ll realize that fresh, homegrown food isn’t limited by seasons or outdoor space—it’s simply about creating the right environment. Whether you’re growing a windowsill herb collection or a full LED-lit vegetable garden in your spare room, these principles apply universally.
The most successful indoor gardeners start small with fast-growing crops like lettuce or basil, experience that first harvest success, then gradually expand their indoor vegetable plants collection as confidence builds. Remember that your edible garden can beautifully integrate with your existing house plants design ideas—mixing ornamental foliage with productive vegetables creates visually interesting, functional spaces. \
Ready to start? Choose one easy vegetable from the recommendations above, set up your growing space this week, and you’ll be harvesting homegrown produce within 30-45 days.
Frequently Asked Questions
How long does it take to get my first harvest from indoor vegetables?
Harvest times vary by crop. Fast growers like radishes and microgreens are ready in 10-25 days, while lettuce and herbs take 30-45 days. Fruiting vegetables like tomatoes require 60-80 days from planting to first harvest.
Can I really grow tomatoes indoors without a greenhouse?
Absolutely! Choose dwarf or determinate varieties specifically bred for containers. You’ll need 8-12 hours of strong light daily and must hand-pollinate flowers, but a single plant can produce 20+ cherry tomatoes indoors.
Do I need expensive grow lights or will a sunny window work?
South-facing windows providing 6-8 hours of direct sun work beautifully for leafy greens and herbs. Fruiting vegetables need stronger, longer light, which typically requires supplemental LED grow lights costing $30-50 for basic setups.
Why do my indoor plants get leggy and stretched out?
Leggy growth signals insufficient light intensity or duration. Move plants closer to light sources (6-8 inches from LEDs), increase daily light hours to 12-16, or upgrade to stronger grow lights for compact, healthy growth.
How often should I water my indoor vegetable garden?
Check soil moisture daily using the finger test—stick your finger 1-2 inches deep. Water when soil feels dry at that depth. Frequency varies by plant type, container size, and home humidity, typically every 2-4 days.
What’s the biggest mistake beginners make with indoor vegetables?
Overwatering kills more indoor plants than anything else. Ensure all containers have drainage holes, use well-draining potting mix (never garden soil), and always check soil moisture before watering to prevent root rot.
Sources
- National Gardening Association – Garden to Table: A 5-Year Look at Food Gardening in America
- University of Arizona Controlled Environment Agriculture Center – Research findings on LED grow light efficiency and vegetable yield comparisons in controlled indoor environments
- American Society for Horticultural Science – Container Size Effects on Growth and Development of Vegetable Transplants
- Cornell University Indoor Agriculture Program – Studies on fertilization schedules and nutrient management for container-grown vegetables in indoor settings
- HortScience Journal – Common Failures in Indoor Vegetable Production: A Survey-Based Analysis
- Indoor Farming Association – Industry reports on vertical growing systems, space efficiency metrics, and comparative productivity data between growing methods